Only one day's work on the boat this weekend, I didn't fully finish the transom brackets but there isn't much left to still do. Next weekend I will tackle the remainder and then start the seam welds. I also tried fitting up the floor and side frames just to see where things are at, it's always a relief to see that things will fit OK. Distortion as always is an issue but hasn't been that bad, the keel line is a little uneven which can be fixed by cutting out the temporary tacks, pushing the panels down and re-tacking. The bottom panels sucked upwards locally during the stringer and frame welding process and because the tacks were too strong. It's better if the tacks break to let the metal expand and shrink and do it's thing properly. Another reason not to put in too many tacks at the keel. Frame#1 also buckled locally a little under the welding of the transom brackets but I don't see this as an issue.
Getting to all the welds at the transom is very tricky unless you perhaps have a very small MIG gun. Some of the welds were really difficult to do, some were 'pulled' rather than 'pushed', another technique worth learning, some fit-up situations are impossible to weld in an ideal position but I guess it is the nature of this beast, there is a lot of reinforcement in this transom design. The large holes in between the brackets help MIG gun access though.
 |
| Transom brackets are fully welded |
 |
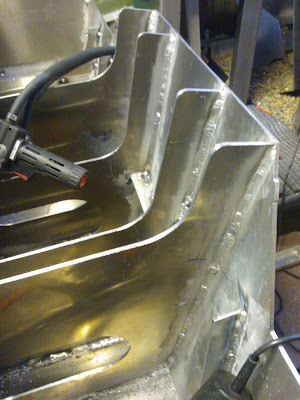
| Stringer - Transom bracket, all fully welded |
 |
| Side frame, may need some trimming TBC |
 |
| Temporarily fitting the forward floor section, this one belongs to the port side actually. |


Comments
Post a Comment