Huge weekend, flipped the boat successfully and as you can see in the photos, the space I had was very tight but with some careful planning and with the expert hands of Peter from Road Patrol controlling his HIAB lifter, the situation was under control the whole time. My welded on lugs held OK so my worst fears were unrealised. I had a backup plan with the straps around the boat as well, just in case but it's nice to know I can lay down strong welds. Once the boat was flipped we lifted each end & slipped a cart under at the bow and one at the stern for getting her back into the carport. Thanks to my brother Theo who gave up his Saturday morning to help me. Theo I am booking you in early for the boat leak test & the final flip :-) I also ordered a trailer on Saturday so I plan to coordinate the new trailer with the boat flip day to save me having to weld more wheels on so hopefully after the final flip, the boat can go straight onto the trailer.
The neighbours had some curious looks, they must think I am totally nuts and they could be right. I spent Saturday afternoon sanding down & back-gouging the keel & transom & got those fully welded on Sunday so I only have the chines to do and also install the keel channel. Since the boat is upside down, I will take the opportunity to weld some brackets under the gunwales for supporting future cables if need be.
 |
| My son thought I was naming the boat 'Broken Tacks' kids are so funny. |
 |
| Took me 3 hrs on Friday night to get the boat out of the carport, the wheels got caught & broke off so I had to improvise. |
 |
| Moment of truth! |
 |
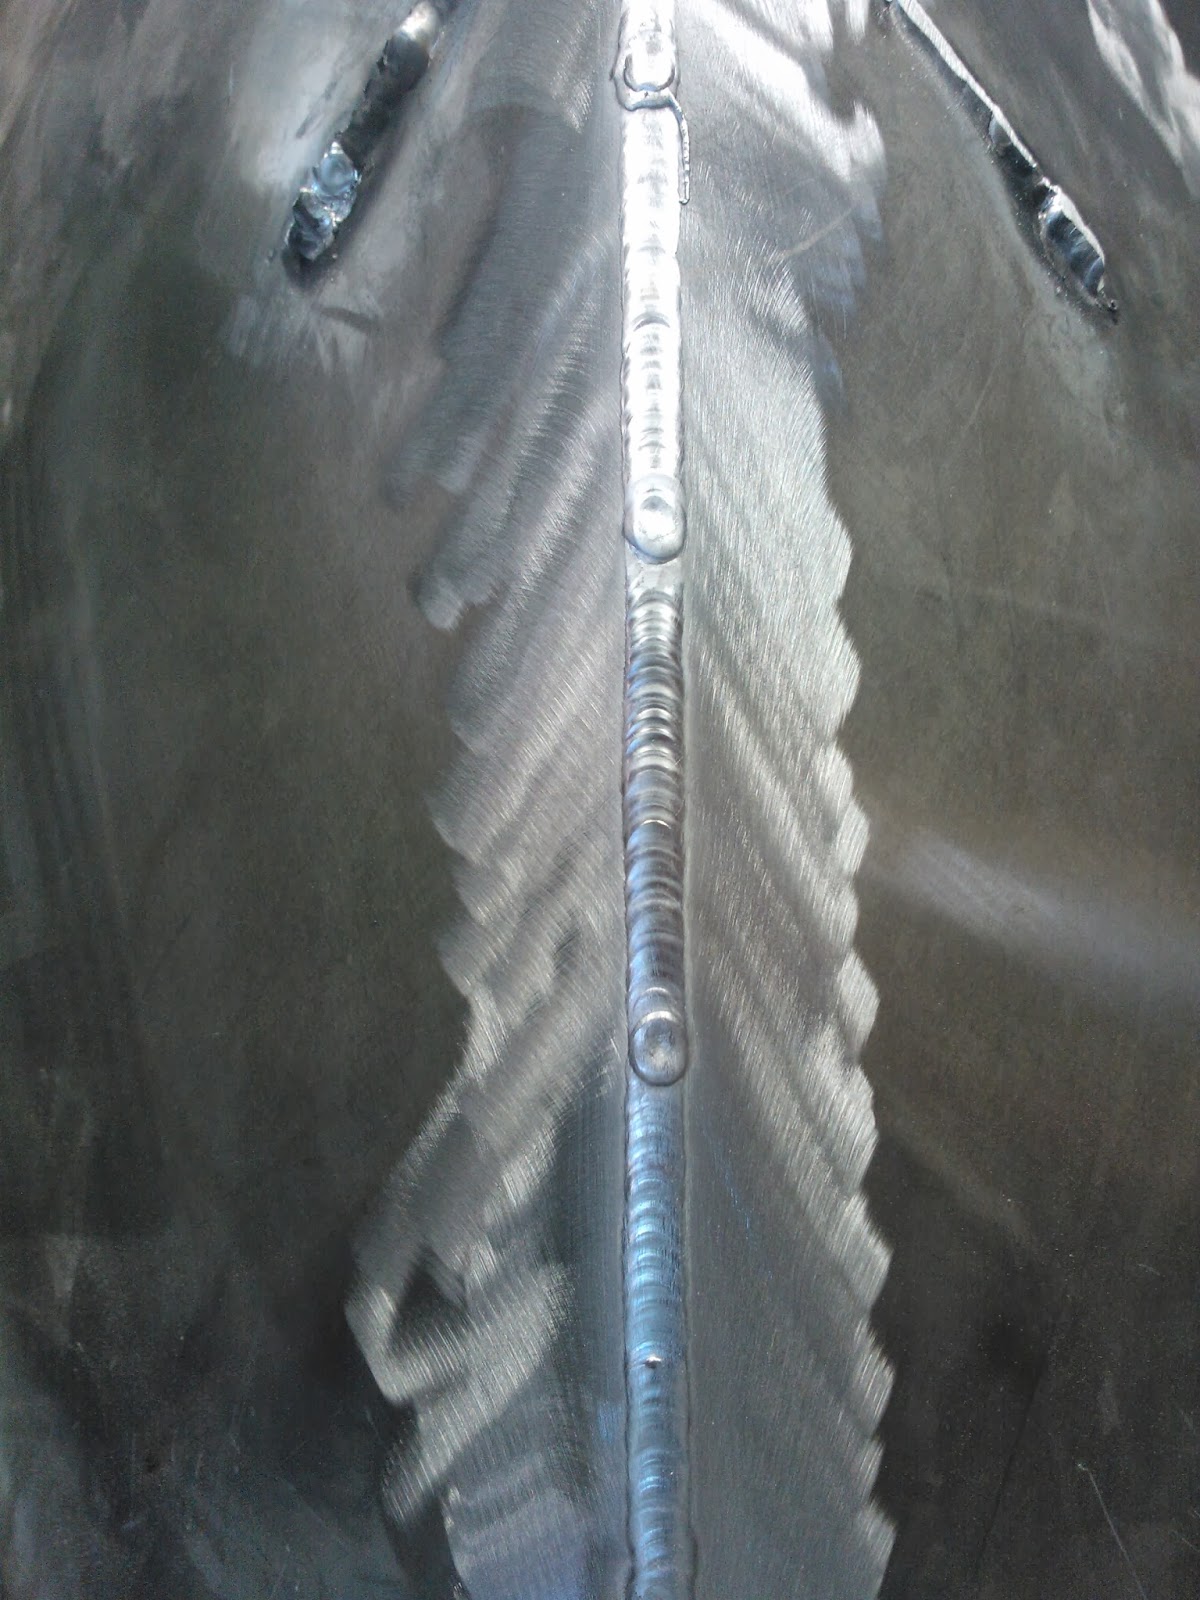
| There she goes - Looks like weld penetration is good, plenty of 'print-through' |
 |
| That's me lifting the boat by hand, all done with mirrors ;-P |
 |
| This is how the boat hangs on the lugs, just what I was hoping for. I had two sets of steel rope, one through the welded on lugs and the other through my back-up plan, 2000kg ratchet straps. |
 |
| Flipping over - I welded a temporary cross bar support for the flip over. |
 |
| Almost there, I had to keep the bow steady so it wouldn't swing around. |
 |
| Done, safe and sound! |
 |
| We lifted the boat, bow and stern to get the carts under the boat that I prepared earlier. |
 |
| Cart under the bow, those castors have a 55kg capacity each and will be broken fairly quickly. It's not the weight but more the lateral movement the cheap castors aren't designed for. |
 |
| Jockey wheels are much stronger for supporting the weight. |
 |
| Ready to be slid back inside the workshop |
 |
| Back-gouging bow at bottom plates - Back-gouging is absolutely necessary if you want good penetration in the weld. |
 |
| View from inside of upside-down hull, cool eh? |
 |
| Keel & bow fully sanded & back-gouged |
 |
| My awesome setup, Lupine Piko on special Lupine velcro mounts & Miller Elite Digital welding helmet. |
 |
| Back-gouged keel & transom |
 |
| More back-gouging |
 |
| First keel weld, a little sooty at first but that improved as I welded more. |
 |
| With the inner chine corner, I am planning to bridge the MIG welds with a small TIG weld to remove the cold MIG starts which are a recipe for pin holes and leaks. |
 |
| Keel welds done |
 |
| Bow lug welded in |
 |
| Bow TIG welded |
 |
| Fully TIG welded bow, bottom keel joint to frame# 6 then used MIG for welds that will be under the keel channel. |
 |
| Close up of TIG weld, bottom plate keel joint, bow. |
 |
| Close up of TIG weld, bottom plate keel joint, bow further up along the keel line. High spots will get a light sanding down, I used a lowish AC frequency of 80hz so I got a nice wide & fat bead here, also a pulse speed of only 1 pulse per second. It took a lot of rod to fill the gap that was left after back-gouging but this should be a pretty solid keel joint. |


Good deal on the flip. Looks good.
ReplyDeleteConall
www.conallsboatbuild.blogspot.com
Basically flipped her on a dime with the space I had :-D
ReplyDelete